The Bus Conversion
Designing the Bus
We got started on the interior layout of the bus even before the bus was purchased. This turned out to be a lot more complicated than we originally thought it would, due to the fact that we didn’t have the exact measurements of the space, not to mention the constraints of building in a bus. First of all, it had to be functional. It had to be a tiny home combined with a tiny office. This meant that it had to have everything that a normal large motorhome would have as well as space for three people to work. Also, instead of the large master bedroom that you would normally find in the back of a tour bus, we needed more than one. (we’re close, but not that close)
Our layouts went through a few generations before we landed on one that would work. 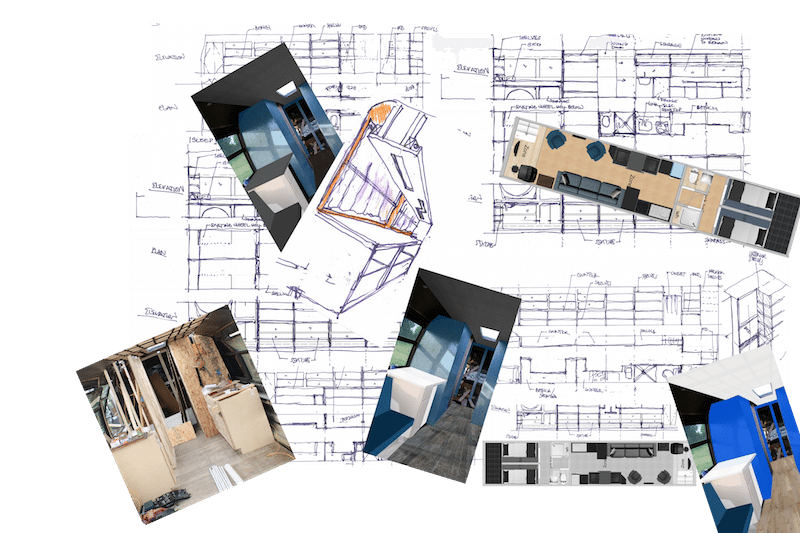
Of course, as we knew that we would be doing all the construction ourselves, it had to be a design that could be built on a reasonable budget by people using the figure-it-out-as-you-go method.
Once we actually purchased the bus, we then had to slightly modify the design to fit into the actual dimensions of the bus and work with how the plumbing and electricity would be laid.
The bus has two side-by-side bedrooms in the far back of the bus. Each bedroom has one bed, but they were built so that if in the future we require more, another bunk can be added in each room to total four individual bunks in two rooms.
The “bathroom” was split up into two separate rooms in order to accommodate plumbing. The toilet is on one side while the shower is across the hall. The Kitchen sits in the middle of the bus on the driver side, with the refrigerator and more cabinets on the other side. In front is the living and working area with plenty of workspace that converts to living space for when we’re just chillin’.
Engine and Mechanics
Once the bus was ours at last, first thing was to make sure it was going to be able to do its job and haul us around Texas. The bus, and its Cummins M11 diesel power plant, had been sitting for a while which is something engines don’t like to do. We went from front to back and worked through some things that needed attention.
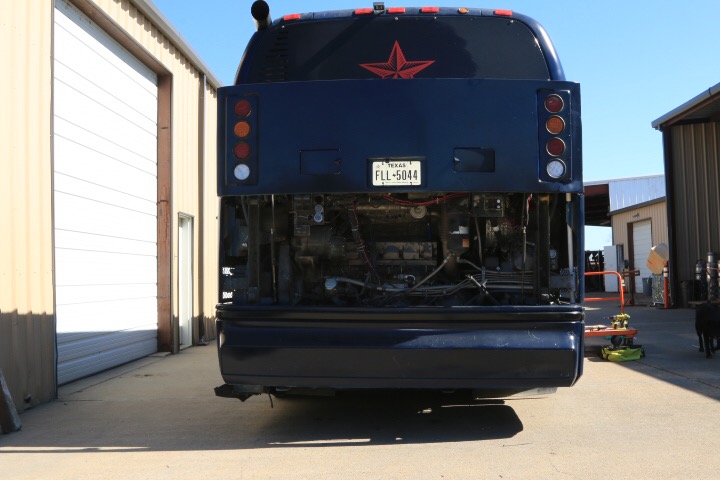
We changed some check valves in the air system and fixed some electrical issues, most of which turned out to be fuse problems, thankfully.
We replaced a number of different bulbs and lights. We drained all the coolant and changed the coolant filter, fuel filters and all of the other filters. We put in a new thermostat and then put in new coolant. We also gave her an oil change. Just you give you an idea of the size of this engine, your normal car will probably take around 4 quarts of motor oil when you give it an oil change. This bus takes around 9 gallons of oil.
The bus has 6 wheels: two in the front and four in the back. The two wheels in the front had pretty solid tires with good tread. All four of the back tires, however, were bald and cracking and had to be replaced.
Framing
Once the bulk of the mechanical and maintenance work was all buttoned up, we started framing out the walls.
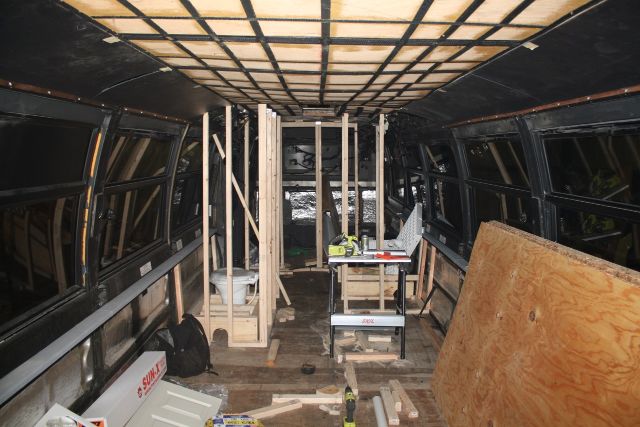
Normally, you would use a blueprint or some sort of plans to go by, but all we had was the basic layout of where we wanted the rooms to go. There was a lot of finagling to be done to get the shower, kitchen and toilet sitting where the plumbing would be able to connect to the tanks that would go underneath. Eventually we came out with a floor plan that would work and we started framing up the walls.
Constructing the Walls
Most of us have had experience building houses in some form or fashion. When putting up a wall, straight and square is the name of the game. We quickly found out that there is no such thing as square on the bus. The top of the bus is round so there is no cutting square walls. Furthermore, this is a kneeling bus that has airbags instead of shocks. Depending on when the bus was aired up last or if the bus was knelt or not, the whole bus could be leaning to one side. Facing of the walls as a whole was a very difficult part of the build.
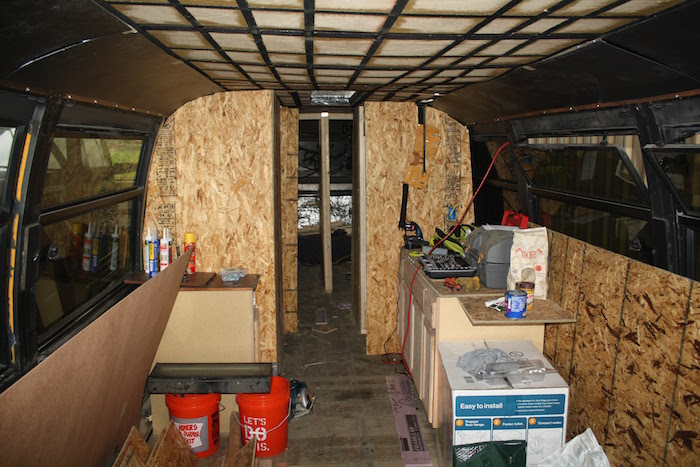
We used oriented strand board, or OSB, for the walls for a couple of reasons. First, it gave the walls strength. The circumstances of the bus didn’t allow us to put enough studs in some places, but the sturdy OSB compensates for this. Another reason for the OSB is that we liked the industrial look that it gave the interior.
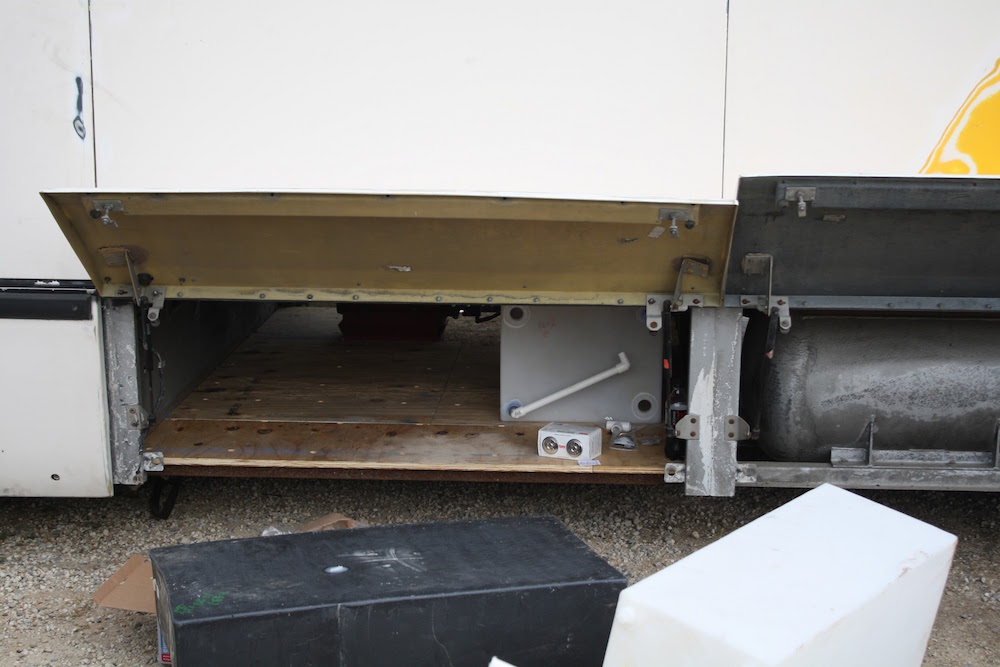
Cargo Bays
The bus was originally built with doors to access the cargo bays underneath, but there weren’t any floors to the bays. With some 2” square steel tubing donated to us by Southwest Equipment Co., we were able to build floors to the cargo bays that are strong enough to hold the three water tanks and the heavy battery banks that will go under the bus.
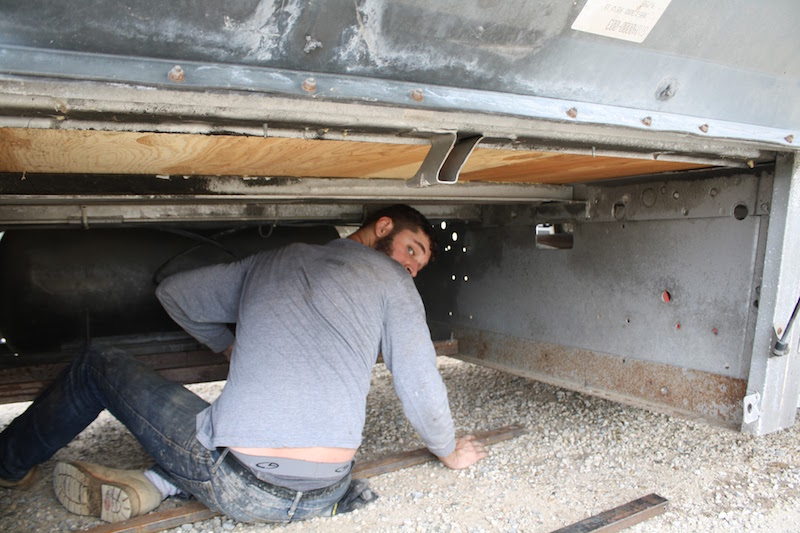
We welded the square tubing to the chassis and covered them with ¾” plywood which we also treated with water sealer. Once the bays were built out, we could install the water tanks and start running the plumbing to the kitchen, toilet and shower.
Plumbing
The heart of the plumbing system is the three water tanks located underneath the bus in the plumbing bay. There is a fresh water tank which holds all of the fresh water, the gray water which holds all of the water from the shower and sink drains, and the dookie tank which holds all of the doooooooookie.
Most modern plumbing in both homes and motorhomes is done using PEX tubing. It is flexible, strong and comes in white, red and blue so you can tell which lines are hot and cold. We were going to plumb our bus with PEX but once we started putting the fittings in our shopping cart, we realized how unbelievably expensive they were. In light of that, we decided to go with PVC for all of the plumbing. PVC is cheap and easy to work with and, most importantly, I have a lot of experience working with it. Of course, for those who prefer professional assistance, they can always discover Sarkinen Plumbing services to ensure a reliable plumbing solution.
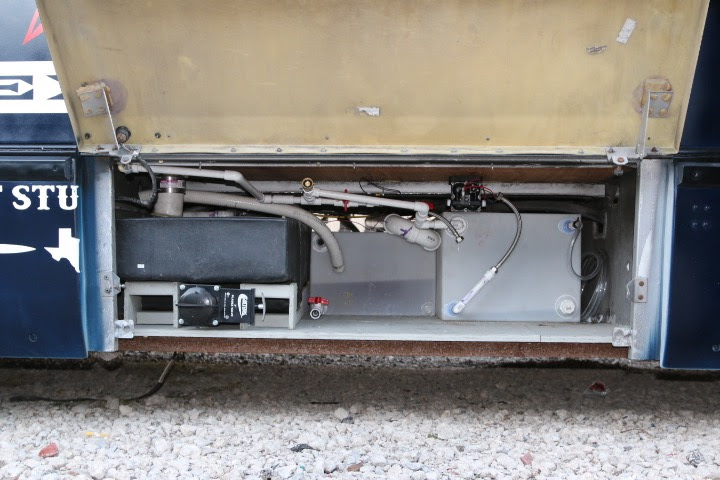
Using a series of ball valves in the plumbing bay just in front of the tanks, we designed a system that can be pressurized using the water pump when we’re on the road or somewhere without water hookups, or we can hook up a water hose and use the city water pressure to run the water. We can also turn a valve and reverse the flow giving us an outdoor hose and/or outdoor shower.
Electricity
Installing the electrical system was the most exciting and nerve-racking job, also the most rewarding once it was completed. We roughed out the electrical system before we put on the walls. We ran romex wiring and installed the boxes where we knew we wanted outlets. One mistake we made was that we forgot to put in switch boxes and wiring for the light switches until we were actually ready to hook everything up. This meant we had to take off a bunch of wall paneling to go back and put those in. Woops.
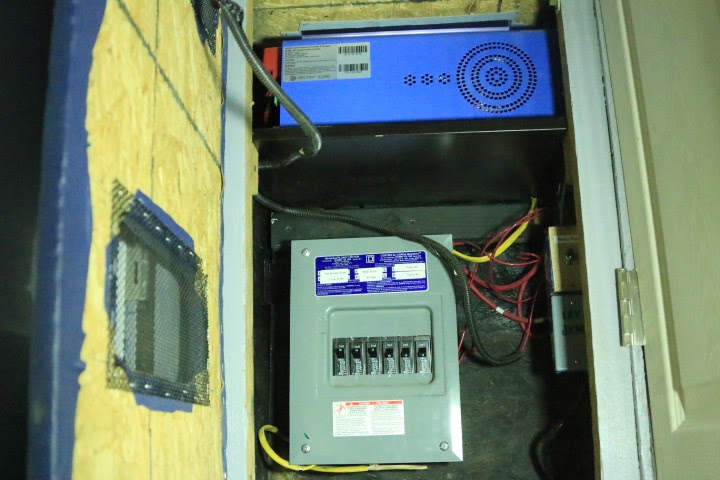
We opted for a bank of 6-volt golf cart batteries wired in a series-parallel configuration which gives you a 12-volt battery bank comprised of 4 different batteries. The 12V battery bank powers a few 12-volt appliances, like the water pump, some outlets and some 12-volt lighting. Most of the electricity, though, is 120-volt like you have in your house and is powered by the inverter.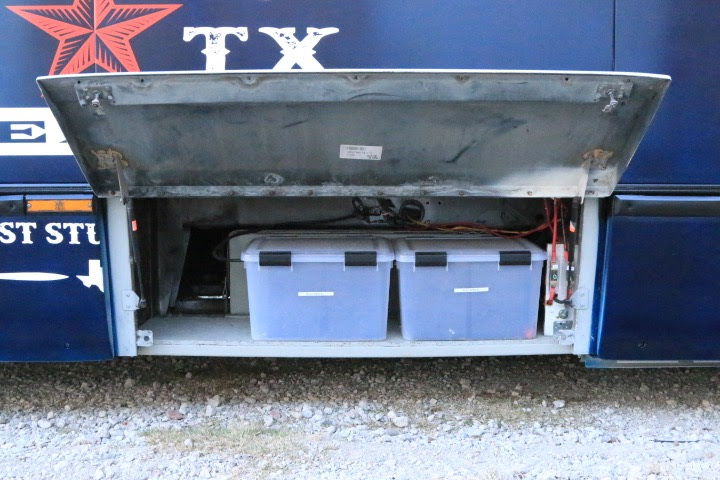
The inverter takes the 12-volt power from the battery bank and converts it to 120-volt power that runs through the distribution panel, or breaker box, and to the outlets, ceiling lights and powers the air conditioner and refrigerator.
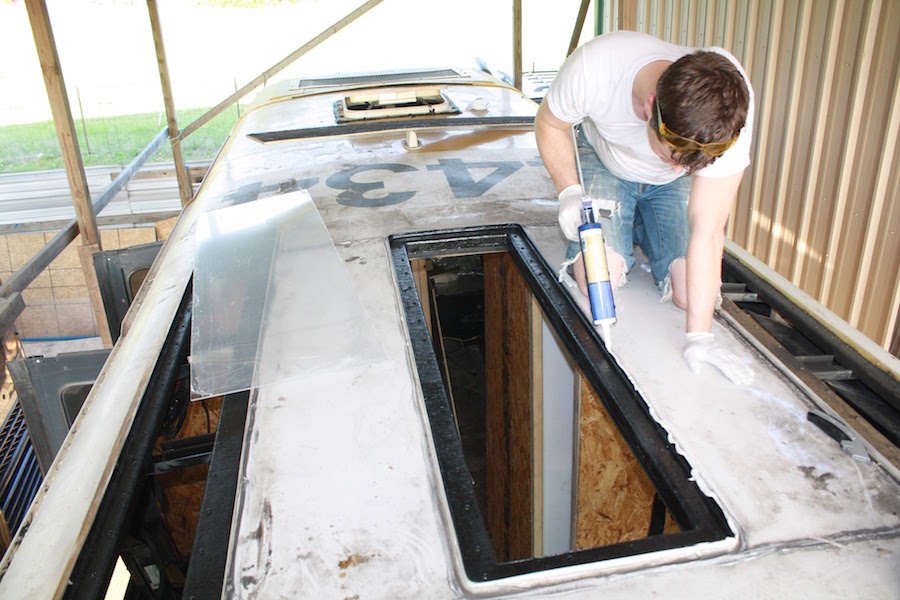
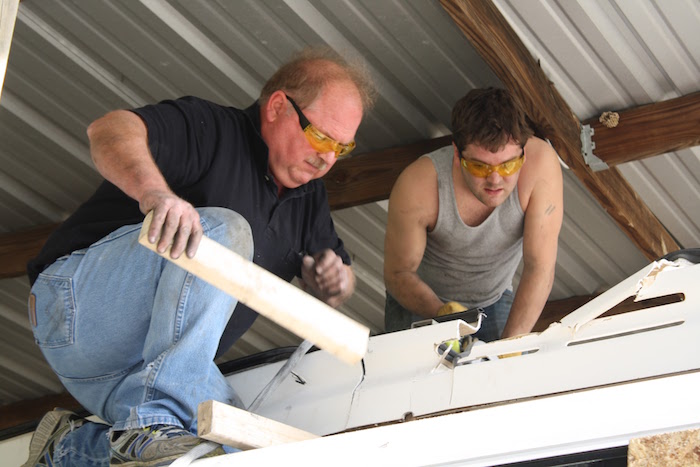
The Roof and Solar Power
The roof of our bus is fairly unique as far as bus conversions go. One of the first things you might notice about our ceiling upon entering our bus is the 5-foot-long skylight in the middle of the kitchen and living room. If you go into the bathroom and look up, you’ll see another long skylight. This is because when we first got the bus, there was an enormous industrial strength A/C unit on the roof that weighed around a ton. This unit was made to keep the bus cool in the 110-degree Texas heat with more than 50 people on board and while the bus was stopping and opening its doors every few hundred feet. Needless to say, it was loud and used a lot of power. We ended up removing it and covering the hole that was left in the roof with plexiglass.
In front of the two skylights are two large solar panels. These panels are the lifeblood of our electrical system. Read more about the bus’ solar system and and where the panels came from.